
Search
Cart
Your cart is empty


0
Your cart is empty
Search

Sophia
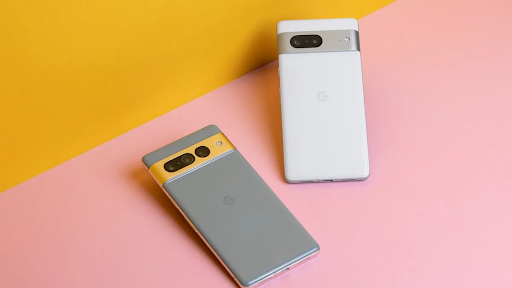
Google Pixel 7 earpiece speaker is a little rectangular part of the mobile that enables you to hear the other person during a phone call. You can locate it at the upper end of the mobile near the front-facing camera. It is connected to the motherboard with the help of a cable. Due to some issues in the earpiece, you can not hear the voice of the person on call on the other side, or you may find it breaking again and again.
Is your Google Pixel 7 earpiece speaker not working well, and you are fed up with audio issues with your Google Pixel 7 earpiece speaker? Then don't worry; we will not leave you alone and provide a step-by-step guide to replace it. You can make crystal clear sound by replacing your earpiece but replacing it in the correct way.
The Google Pixel 7 earpiece is designed to hear calls and give an audio output when using various applications, such as watching videos. It provides you with high-quality audio results that enhance the user experience. But if it produces distorted sounds, broken voice notes, or unclear music sounds, its replacement becomes necessary to avoid inconvenience. If you want to learn effective Google Pixel 7 earpiece speaker replacement methods, keep reading to know about these methods!
Have you ever wondered why we have to replace the earpiece speaker of our Google Pixel 7 and why it starts causing trouble? For the first query, you must know that sometimes repair is not enough and again creates problems, so it becomes necessary to replace it. Moreover, its replacement is simple, and you can do it easily at home.
For the 2nd query, some points answer it. There are specific reasons for the impaired function of the earpiece. These reasons distort or disturb the audio output of the earpiece speaker, leading to its malfunction. These particular reasons may be:
· With time, tiny dust particles get stuck in the earpiece and accumulate to block the speaker mesh, which stops the earpiece's normal function.
· During cold or humid days, water vapors in the environment can enter the earpiece speaker and cause short circuits, leading to malfunctioning.
· Sometimes, there may be compatibility issues of the earpiece with specific software of your phone, which can cause audio problems. You may fix it with a software update. If it still doesn't work, then replacement is the only option.
· Sometimes, you can drop your phone while running or walking, damaging it and making its earpiece nonfunctional.
· There are also chances that your Google Pixel 7 earpiece speaker was prematurely manufactured, leading to lousy functioning.
· Sometimes, you install third-party apps not optimized for your device, which may cause earpiece sound issues.
· The intense use of the earpiece can degrade, leading to reduced performance or failure.
There are some essential precautions you have to adopt before replacing the Earpiece speaker. For example, discharge the battery below 25% before disassembling your Google Pixel 7. It is because by doing this you can reduce the chance of damaging your mobile phone during replacement.
If your battery is swollen, you must remove it because operating your device on a swollen one can harm your mobile. It should be noted that the Google Pixel 7 contains class 1 lasers, so use such material that can absorb infrared invisible radiations.
To replace the earpiece speaker of your Google Pixel 7, you have to follow these simple steps:
You must gather the necessary materials and gadgets to replace the earpiece speaker properly. These materials are a Compatible earpiece speaker, screwdriver set, plastic opening tools or spudgers, heated iOpener, heat gun, opening picks, suction pump, tweezers, safety gear, and proper workspace and lighting. There are some other things, but they are optional, as you can use them if needed.
After gathering specific material, you must follow all the precautions we have discussed before to discharge the battery below 25%. You must also switch off your phone and unplug the cables if attached.
In the next step, choose an adequately cleaned area for work, and to protect your eyes, put on safety glasses.
This is an essential step as you have to take care that during screen removal, you must only separate the screen from the phone assembly, not from its safety frame. Ensure that when you insert the opening pick to remove the screen, insert it up to 3.5 mm to avoid internal damage.
The screen of the Google Pixel 7 is packed in a place with the help of plastic clips and adhesives, so you have to lose it. You can apply a heated iOpener or heat gun to lose the screen for three minutes. Be careful that you do not overheat the device.
In this step, you have to use a suction pump to lift the screen with its safety from slightly up from the phone assembly, leaving a gap between them. Now, insert an opening pick in this space. After that, insert another opening pick in this gap and move right to slice the adhesive. Then, place another opening pick, move it left to cut glue, and keep the opening picks in their place to avoid resealing the screen with assembly.
Insert the next fourth opening pick into the top left corner and the fifth into the top right corner to slice the adhesive.
Lift the screen on the left side just like opening a book, and don't lift more up as the screen is still connected to the assembly by a cable. Release the line by inserting the arm of tweezers into the opening of the display cable bracket. Then remove it and disconnect it using a spudger.
After the screen removal, use tweezers to remove the black silicon pad from the battery and midframe of your phone. You must be careful while doing this as you may puncture your battery with tweezers, which can release harmful chemical material. This material can damage your phone.
In this step, you have to peel off upper and lower graphite foils from the battery and midframe using tweezers. You can use a heated iOpener for two minutes if their removal becomes difficult.
At this point, you have to remove the midframe with the help of a screwdriver and tweezers. Also, disconnect the battery cable with the help of a spudger.
In this step, you can use isopropyl alcohol or spudger to remove the thermal paste from the motherboard. Then, cut the facing camera's connection from the socket with the help of a spudger and remove it using tweezers.
Now locate the earpiece speaker in your google pixel 7 and remove its screws using a Torx T3 screwdriver. Then, pry upward with the help of a spudger to lose it, and use a pair of tweezers to remove it.
In this step, take the new earpiece speaker and fit inside your phone correctly with the help of adhesives and screws.
Reverse the overall process and reassemble it using the right gadgets and adhesives.
If you are still facing some issues after the replacement of the earpiece speaker, you must have to check the following:
In this article, you have learned a step-by-step Google Pixel 7 earpiece speaker replacement. It can be complex, but if you do it in the right way, you can easily replace your earpiece speaker at home. The earpiece speaker is a small component on the front screen next to the facing camera. Sometimes, it must be fixed, creating audio output problems for various reasons.
There may be several reasons behind its malfunctioning, and you can easily handle these issues. For example, dust particles are sometimes stuck in the speaker mesh, which causes voice blockage, and you can quickly recover just by removing this dust. There are also chances that you have installed some third-party applications that may have compatible issues with your earpiece speaker; you have to uninstall these applications to solve your speaker audio issues.
Sometimes, your earpiece speaker has other genuine issues, and you need help solving that problem. In such a case, replacing the defective earpiece speaker with the right one becomes necessary. For this purpose, you must be very careful as you may damage your Google Pixel 7 if you need to handle it properly. So you have to follow all these practical steps to replace it correctly. After replacement, you may face issues regarding your speaker output again, so make sure you have done each step right.
Get the latest articles on all things data delivered straight to your inbox.
Share
All blogs articles

Are you looking for budget-friendly but high-tech smartphone options in Australia? Are you striving to invest your hard-earned money against quality?...
As much as we love high-end smartphones, it's becoming impossible to afford them. Unless you earn a high salary and receive an annual promotion, it wo...
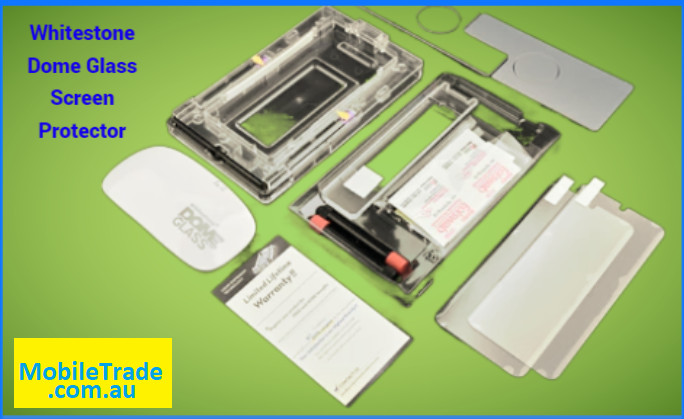
Whitestone Dome Glass Screen Protector is one of the best options to protect your phone from scratches, cracks, and other types of damage due to its s...